Pages

Showing posts with label DIY. Show all posts

Tuesday, May 28, 2013

More Retaining Wall

Once again I have had trouble finding time to blog, but we have had a lot of projects going on over the past few weeks.  We have completed building the retaining wall for our swingset, ripped out all of the existing landscaping in the front, and we are currently getting a new roof compliments of a big hailstorm last year.  The finished product from the retaining wall turned out great, but I have been waiting on getting a load of fill dirt till after the roof was installed.
Finished wall with some fill dirt we had on hand. 

Another view.

And another view.
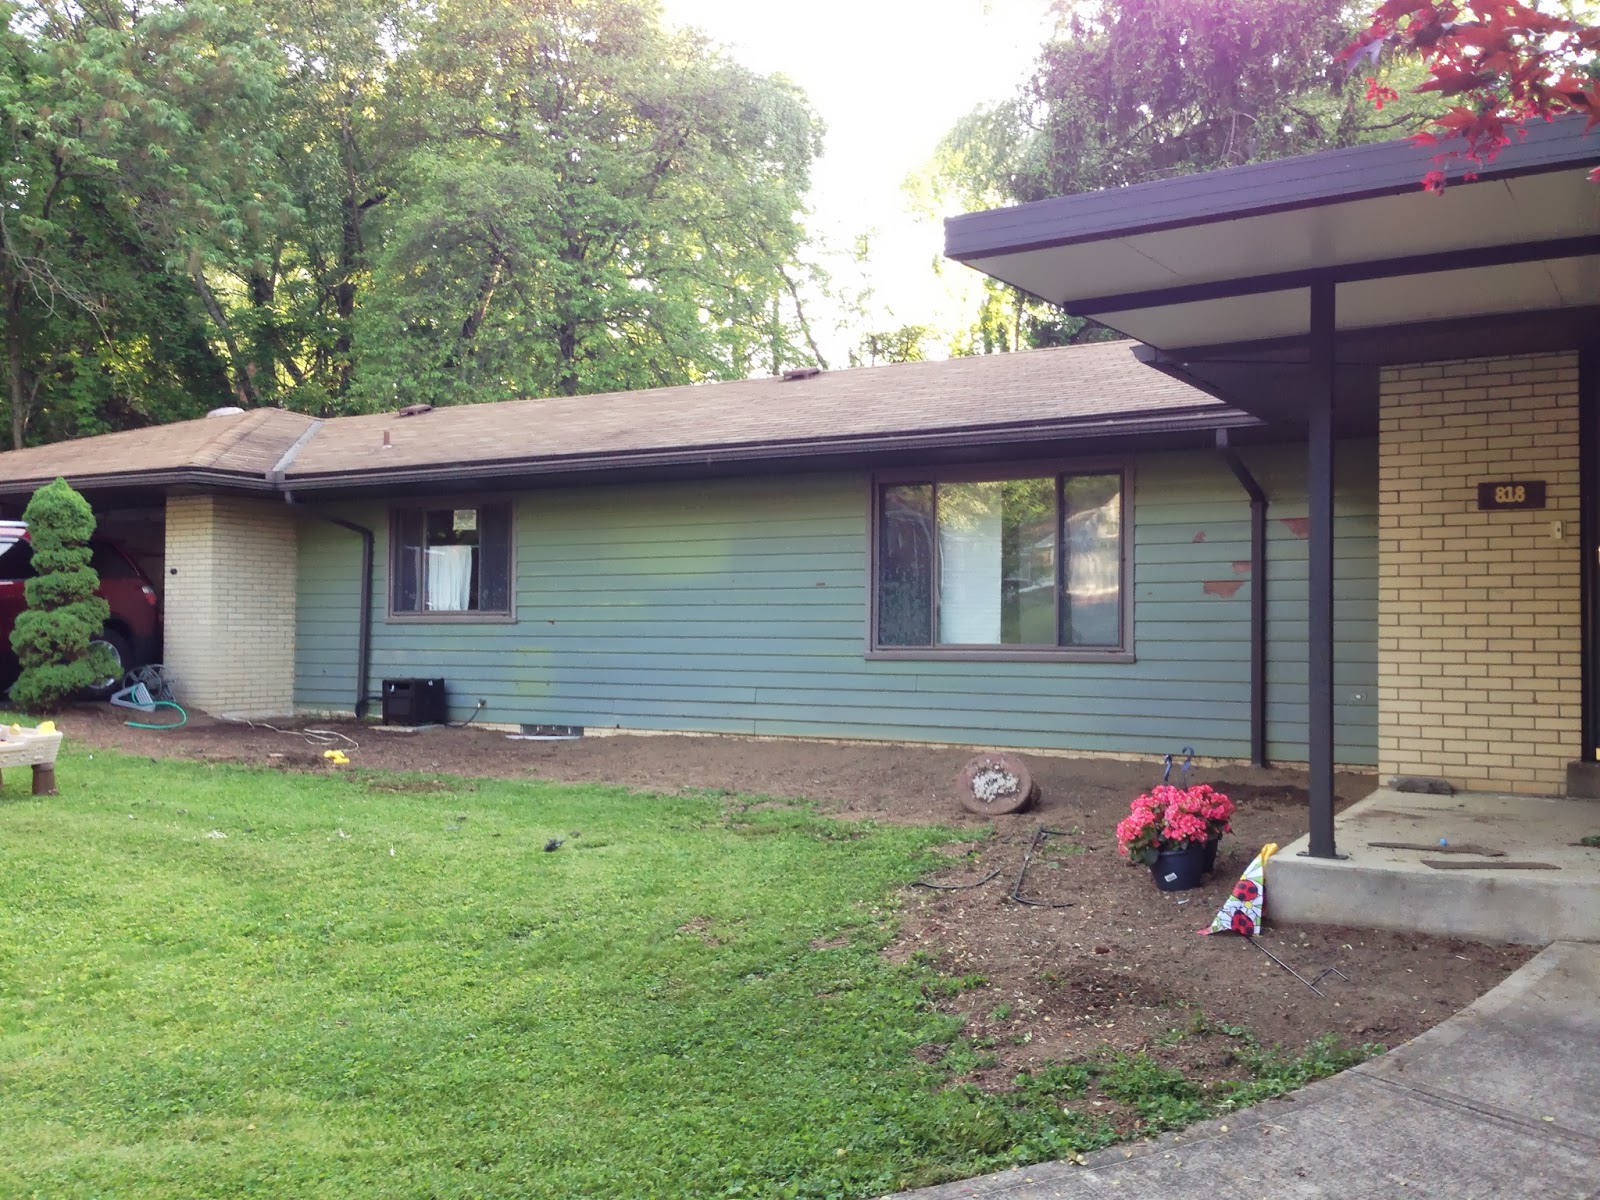
Hopefully we can get some fill next week and have a swingset soon (my son keeps asking about it so we have to deliver before he goes crazy).  The other project going on is our landscaping in the front of the house.  This is something we have wanted to do since we moved in, but with so much focus on the inside of our house we have put little effort into fixing up the outside.  The previous owners were an older couple who let things get a little out of control, we had over grown shrubs that I had trimmed back but it still looked like a bit of a mess.  I'm still new to this blogging thing and have issues with forgetting to take pictures so I really don't have a great picture of what the front of the house used to look like, but I do have pictures of during and after tilling up the old flower beds.


The finished product, after tilling and leveling. 

The plan was to get all the landscaping finished and paint the front siding of the house this past weekend, but we ended up making an impromptu trip back home to our old house (which we are selling) to fix a few things that came up during the inspection.  This weekend will hopefully see us finally finishing the landscaping and paint.  


Tuesday, January 29, 2013

DIY Toy Cubbies

I've had this lumber for a few months now, I picked it up on sale at Busy Beaver and have had plans on creating some toy cubbies for our living room.  I drew out a rough sketch of what I wanted to do with it and it has sat in the garage ever since.

The other night I finally got it out and tried to start marking it up for my cuts.  I brought it all in to the dining room table, because; well that was the easiest place to mark it up and not leave my 2 year old helper behind. 

Hopefully, when put together this actually matches the idea in my head.  With no real place other than some Ikea Skubb baskets to house all our smaller miscellaneous toys, such as; wooden blocks, Lil' Wheelies, and Mr. Potato Head pieces we are in desperate need of a more permanent, functional storage solution.  

Anyways, if it works out I'll post some pics of the finished product and hopefully some plans if anyone else would be interested in something similar.

Friday, January 18, 2013

Drywall Everywhere

With everything ripped out, new walls built, and cable and network wires ran to every room it was finally time to start sealing it all up.  We had 100 sheets of drywall and approximately 2 weeks before we were set to have carpet installed. 

My parents were once again up to help, with my mom stuffing insulation in the walls (there was previously none) and my Dad and I hanging drywall we were off.  It started out slow, but once we got in a groove we were moving around pretty quickly.  I must say after a few rooms I became a master at cutting out outlets and switch holes in the drywall and things were moving pretty smoothly.  It still wasn't going as fast as I had hoped, but we were in a rythm and seemed to be getting the job done. 

The next weekend my brother-in-law made the trip up as well and with a little more manpower we not only knocked out the rest of the drywall, but also got the doors and French door in the living room installed.  Previously our living room had an oddly placed door in the corner leading out to the patio with a huge, albeit, ugly window looking out.  We covered up the old door and took out the window in able to put in some French doors leading to the patio.  Here are some before and after shots...


Before and after shots of the French Door we added. 
 I spent most of the rest of the following week finishing the drywall.  This was the first time I had ever finished drywall and while I din't find it to be a difficult task, it was certainly a tdious one.  I remember my forearm and hand throbbing from holding the knife for such long periods of time, but in the end I was pleased with my work and asides from a few isolated spots I may have missed we ended up with some pretty even walls.  As you will see from the pictures we chose to hang the drywall vertically instead of the more traditional horizontal method mainly because the ceiling was already crumbling where there was existing crown moulding and we were going to have to put new crown up to cover it either way.  Here are some shots of drywall hanging and finishing.


First pieces are up in the Master.


Cut-out four our in-wall entertainment rack.


This was by far the biggest part of our project and it was a relief when it was over, mainly because it was time to get carpet and move in but also because I had been working myself to death for the previous month. 

Friday, January 11, 2013

Taking Out Walls

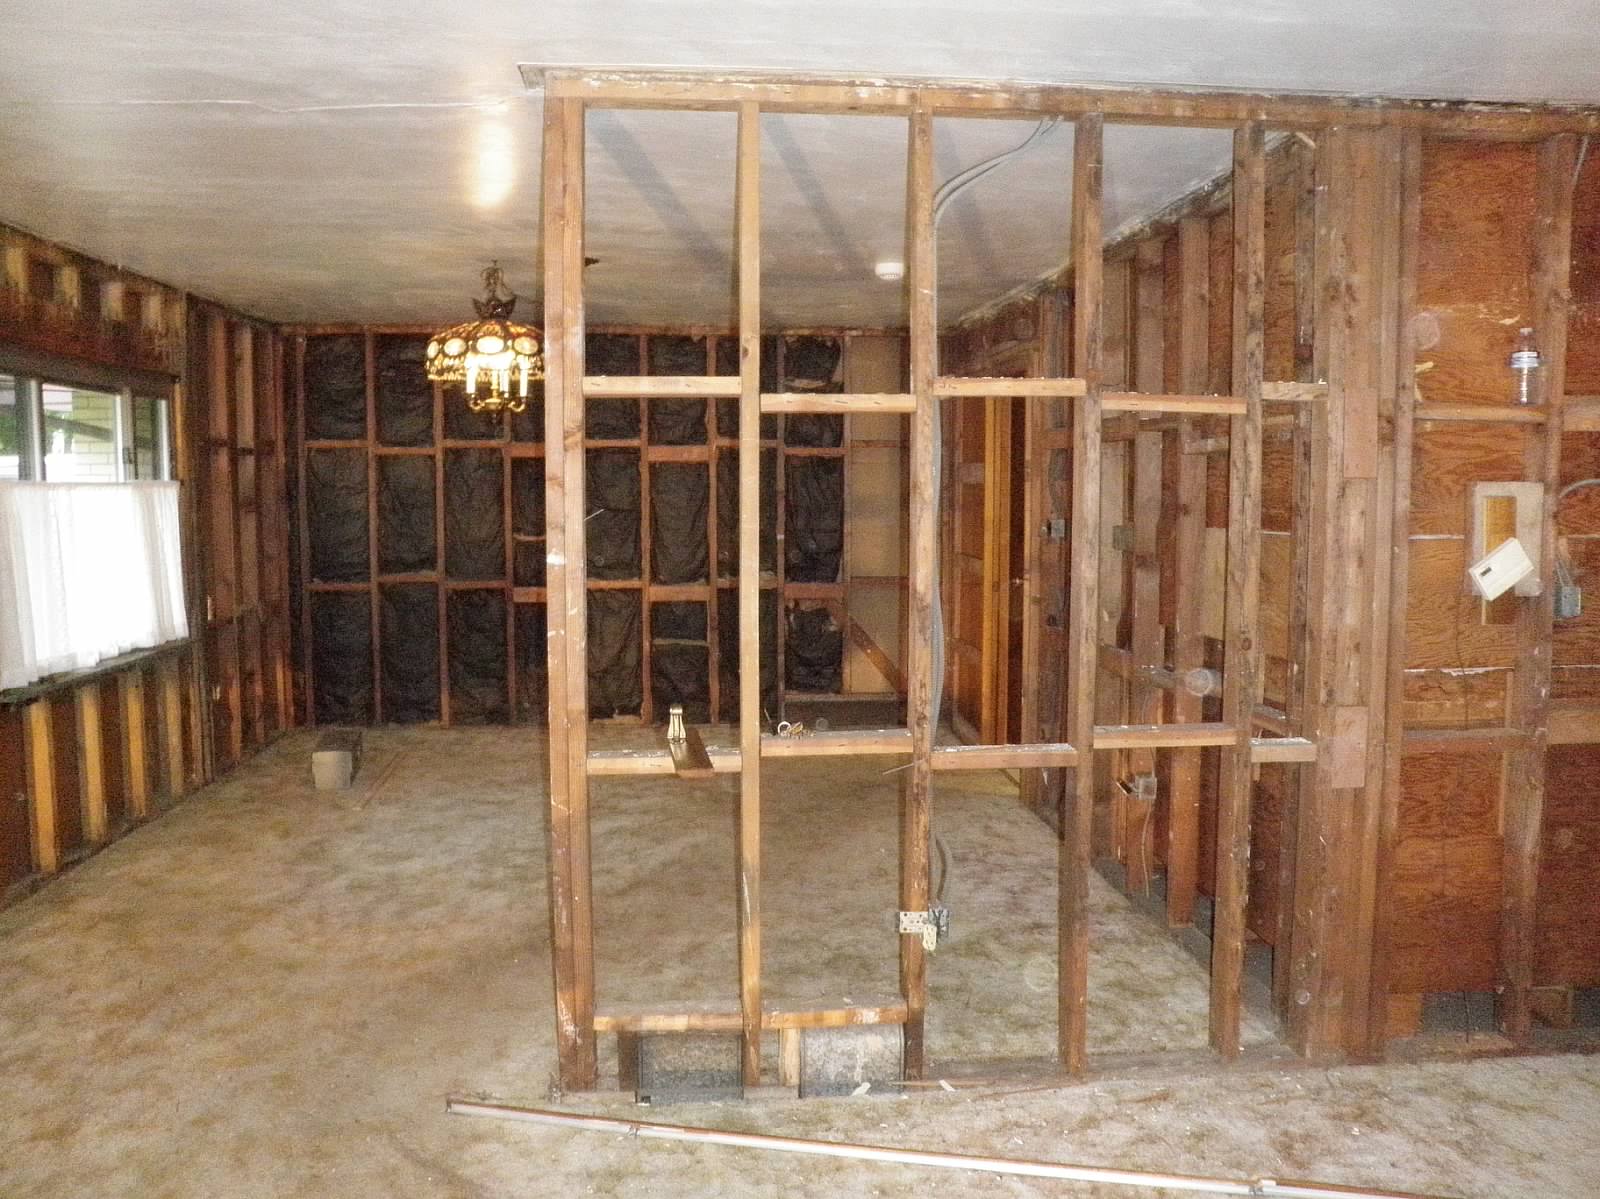
My next project was to get rid of the pointless wall between the living room and dining room.  It seemed like a very unnecessary wall that closed off the dining room a lot more than it needed to be.  Here is the wall already stripped down to the studs...


You can see that the only real purpose this wall served was housing a few HVAC vents and an outlet, other than that it just seemed weird.  It didn't really seperate the rooms as the opening between the wall and the outside wall to the left was still a large opening, but the offset just killed all flow.  We pictured it completely open with knee walls creating a center opening and a few columns to clearly divide the two rooms but also keep it one space. 

To start out I climbed up into the attic and checked out the rafters to see if it was load bearing or not.  I didn't think it was (as a structural engineer you would think I could say that with a little more conviction), but just to be sure I put up a temporary wall and got to work removing what was left of the wall. 


With everything gone but my "temporary wall" which consisted of 6 2x4's and no nails, probly not the safest but at some point I need to trust my engineering degree and believe myself when I say it isn't load bearing, I was ready to build the new wall.

I used a few 2x6's across the top with some 2x4 spacers to make a beam 5.5" wide to match the 2x6 columns I was putting in.  With the new beam across the top and new columns it was starting to come together. 


Finally I finished it off with the knee walls...


Overall we were very happy with how this turned out, we got two distinct spaces but added a much more open feel to the area.  Plus, we now have the knee wall as a place for decorations and picture frames and of course columns to wrap in garland for Christmas. 

Thursday, January 10, 2013

DIY Curtain Rods

While we still have plenty to catch up with where we are now, but this is a look at our most recent project.  Our daughter was born in July and since then her room has not progressed any from the unfinished state it was in before she got here.  We have had her crib in our room up until now, but we are all ready to try and make the move.

Asides from the two unpainted walls and the closet that still needs another coat of drywall mud, our next major concern would be the four windows which currently sit with no curtains, blinds, shades, or coverings of any type.  While her room is on the back of the house and very private, we still couldn't fathom putting her in there with nothing covering the windows.

We found a great deal on these blackout curtains from Meijer, but after looking for curtain rods knew there had to be a way to DIY something for much less than the $100 we would spend to hang them all.  We headed to Home Depot and picked up 2 10ft lengths of 1/2" electrical conduit for $2 bucks each, a couple 4 packs of 1/2" conduit straps for $0.80 each, a couple 4 packs of 2" L-brackets for $4.68 a piece, and lastly found an 8-pack of nuts and bolts that would fit thru the L-bracket to attach it to the conduit strap for a dollar or two.  The final cost was around $17, much better than the price of curtain rods if we can get them to work.  You probly want some spray paint too, but we knew we had some at home already that we wanted to use. 

I started out with my trusty hacksaw and cut the 2 10ft lengths of conduit down to 4 4ft lengths, which would give us approximately 6 extra inches on each side of the window.  I actually would have liked to make them even a little longer than that, but our windows are in the corners I ended up not even being able to get the full 6 inches of overhang on the corner sides.  With the pieces cut I attached the conduit strap to the L-bracket with the bolts and then took the entire assembly along with the rod out to the garage for painting.  I even took the screws I was using to attach to the wall and stuck them in the box to spray paint the heads of them so nothing stuck out when it was finally in place.  You could also paint all the pieces individually before assembly, but I figured that you might lose some paint on the bolts when tightening them up so it just seemed easier to paint it already put together.

Here is a look at the pieces all painted...


The cunduit will then fit into the strap like so...


Screw your L-brackets to the wall and you are good to go, here is a sneak peak at the finished product.


We are hoping to finish the bedroom (asides from the closet, more on that later) , this weekend and I will post more pictures of the final result.  This at least gives you an idea of how easy it is to DIY some curtain rods for way cheaper than store bought ones.  I have even seen where you could take a block of wood or dowel to hammer into the end and screw a fancy cabinet knob in to make them more decorative.  We haven't got to this but with the rods practically touching in the two corners we could only do this on the 4 outside ends which would just look odd. 
 
Pin It button on image hover